Butt Welding
Questions and Answers
This question was answered earlier in another article in this blog:
“WE ARE BUTT WELDING 0.500” DIAMETER 1008 STEEL. HAVE TRIED SEVERAL FORCES, PULSES AND SLOPES WITH NO SUCCESS ON A 30 KVA WELDER. NEED SOME GUIDANCE”
Based on that article a 30 KVA welder probably is large enough for this butt-welding job.
The person making this inquiry has seen this finished product and questioned is it better to butt welded before or after the plating process?
A second question was could equipment be fabricated in house to perform the butt welding?
It is this authors belief never having seen this product, that the plating process is a post welding operation. Butt welding and the generated heat would severely distort physically disfigure the area of the butt weld. Material removal is likely required to resize the butt weld/upset area. Any pre butt weld plate and diamond in that area would have been ruined. If nickel plate is necessary in this area, at least a spot replate could be performed. The diamond would be missing for this short length.
It would be assumed this diamond tipped wire is being used to cut through some very difficult/hard materials and coolants will likely be present. A short welded length may not be a problem.
This cross section of steel is large and would probably not be a candidate for spot welding. Butt or flash welding would be a better choice. I am not aware of any chart available in the marketplace to offer power requirements or suggested schedules by cross section for this type of material.
If your facility has equipment in house or you can rent time somewhere, trial and error would be my suggestion. Always start trials at low power settings and work up to higher power levels for safety sake. When you begin to get some sort of welding hone in slowly to good results and record all welding conditions.
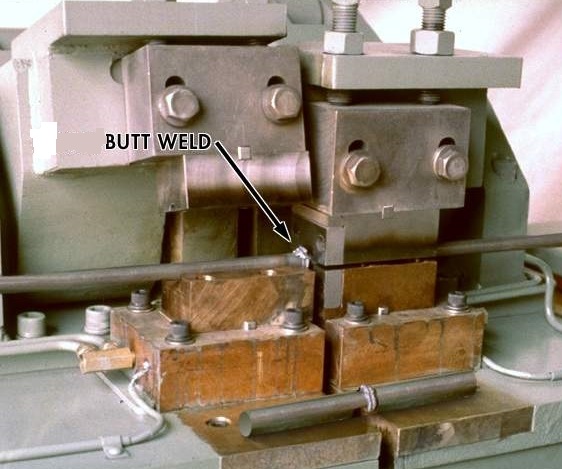
Copper, aluminum and steel wire and rod are frequently butt welded in industry in order to form large coils for drawing down from large gage diameters to smaller gages. This reduces handling and costs.

STEEL ROD BEING BUTT WELDED
The question is where can one find a butt weld schedule for this process? AWS C1.1 “Recommended Practices for Resistance Welding” lists one schedule. It is for Aluminum 1.6 mm Thick (0.063”). There is nothing readily available for rod or wire.
To solve this issue one must turn to trial and error.
To do this a controlled experiment will be set up with the parts on the butt welder to be used.
The first step is to Get the machine ready for operation. Maintenance may need to be performed on the equipment. Definitely the equipment condition needs to be evaluated. This evaluation can be performed by following the steps outlined in AWS J1.2 “Guide To Installation and Maintenance of Resistance Welding Machines”.
When the machine is ready to operate then it is time to prepare samples for testing.
Prepare Samples *
Clean up the Butt Welder
Prepare tooling – Clean up and align properly
Make sure tool will grip the part properly
Set transformer tap, control/power supply to lowest settings
Adjust force – clamping force should be at least twice the forging force
Forging force will depend upon material being welded and its diameter?? and your machine capability.
Try a dry run without power??
What happened
Did the part slip? More clamping?
Too much forging force?
Adjust
At lowest power/ON run the first sample - What happened?
No weld ?
Adjust time or power or tap up modestly, try again
What Happened? No Weld
Repeat till a satisfactory butt weld is achieved.
THIS IS TRIAL AND ERROR – The secret to every successful process

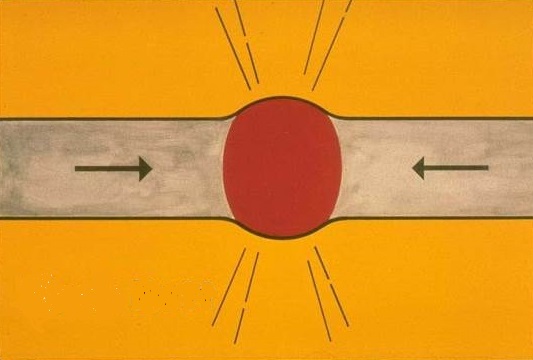
SCHEMATIC OF A BUTT WELD
With a good weld schedule that works record all of the variables on the weld schedule sheet take a photo of the set up and start production.
Reference: AWS C1.1 - Recommended Practices for Resistance Welding
AWS J1.2 - Guide to Installation and Maintenance of Resistance Welding Machines
RWMA – Resistance Welding Manual 4th Edition
*Important many machine set up steps were not have been listed here. This was meant to demonstrate the sample testing starting at low power settings and adjusting up to higher satisfactory levels.
A 30 KVA welder probably is large enough for this butt welding job. You noticed in your trials that at lower forces results were poor. This was an indicator that force is the variable that should be addressed first. There are two forces in butt welding. One is the force to press/forge the two parts together. The other is the clamping force holding the parts to prevent them from slipping in the clamps. Ironically the clamping force is normally double (or greater) the force pushing the butt ends together. The clamps should have a slight knurl to prevent slipping. Confirm that the part does not slip during butt welding.
Page 2 of 4
Have a Question?
Do you have a question that is not covered in our knowledgebase? Do you have questions regarding the above article? Click here to ask the professor.
